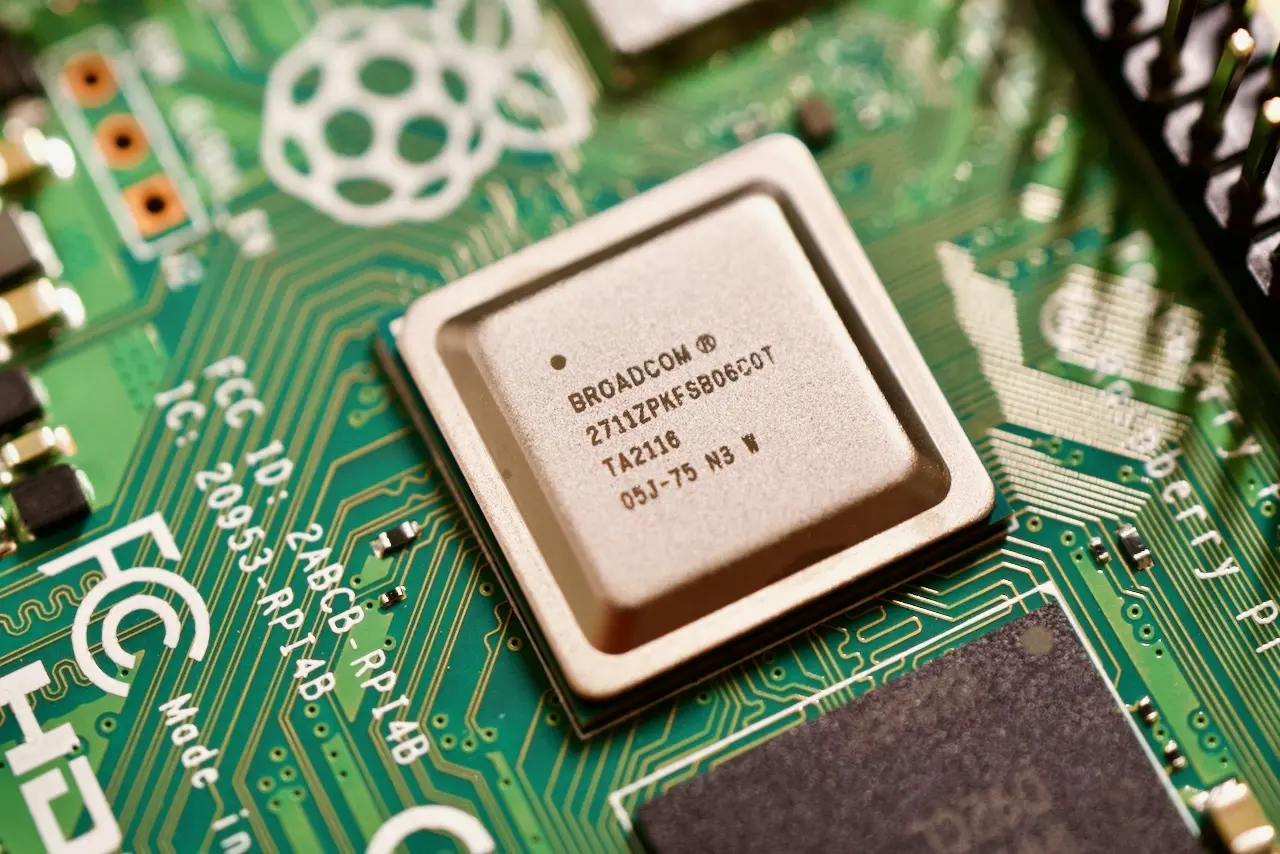
My Server - Raspberry Pi 4
Why a Raspberry Pi 4?
I chose to use the Raspberry Pi 4 (before the launch of the 5th) because I knew how small it is and how power-efficient it is! I know that in the price range (a bit more than 100€ with everything, not counting with an HDD), I could buy some used PC and have a more powerful machine, and probably even cheaper. But, a thing I consider really important when setting up a server is power consumption. And really, hardly any machine consumes less than a Raspberry Pi.
So, I preferred to choose a Raspberry Pi 4 (perfect for my use case).
Server specs
- A Raspberry Pi 4 - 8GB (yes, a Raspberry Pi)
- A Flirc Case for the Raspberry Pi
- A simple 32GB SD card - for boot and small files
- An external 4TB to store larger files, such as media files
- An Ethernet cable to connect to my router
- And the power supply for powering the Pi
The Birth of the Project
I decided to create my own server as I became more preoccupied with my digital privacy and how my data is managed, and probably shared with other parties (right??).
So the best solution to such a problem is to simply ditch the services that you’re worried about and self-host open-source software. And I must say, it’s way simpler than it might look!
What I Self-Host?
The process of self-hosting is an evolving process. I started with software that today I don’t use anymore because I didn’t find any more use-case for it. It’s a customized process that fits the needs and preferences of every self-hoster.
Services I Self-Host:
Media
- Homer Dashboard
- AudioBookShelf
- Jellyfin
- Komga
- Navidrome
- Random TED Videos (Custom App)
Productivity
Automation
IT Management
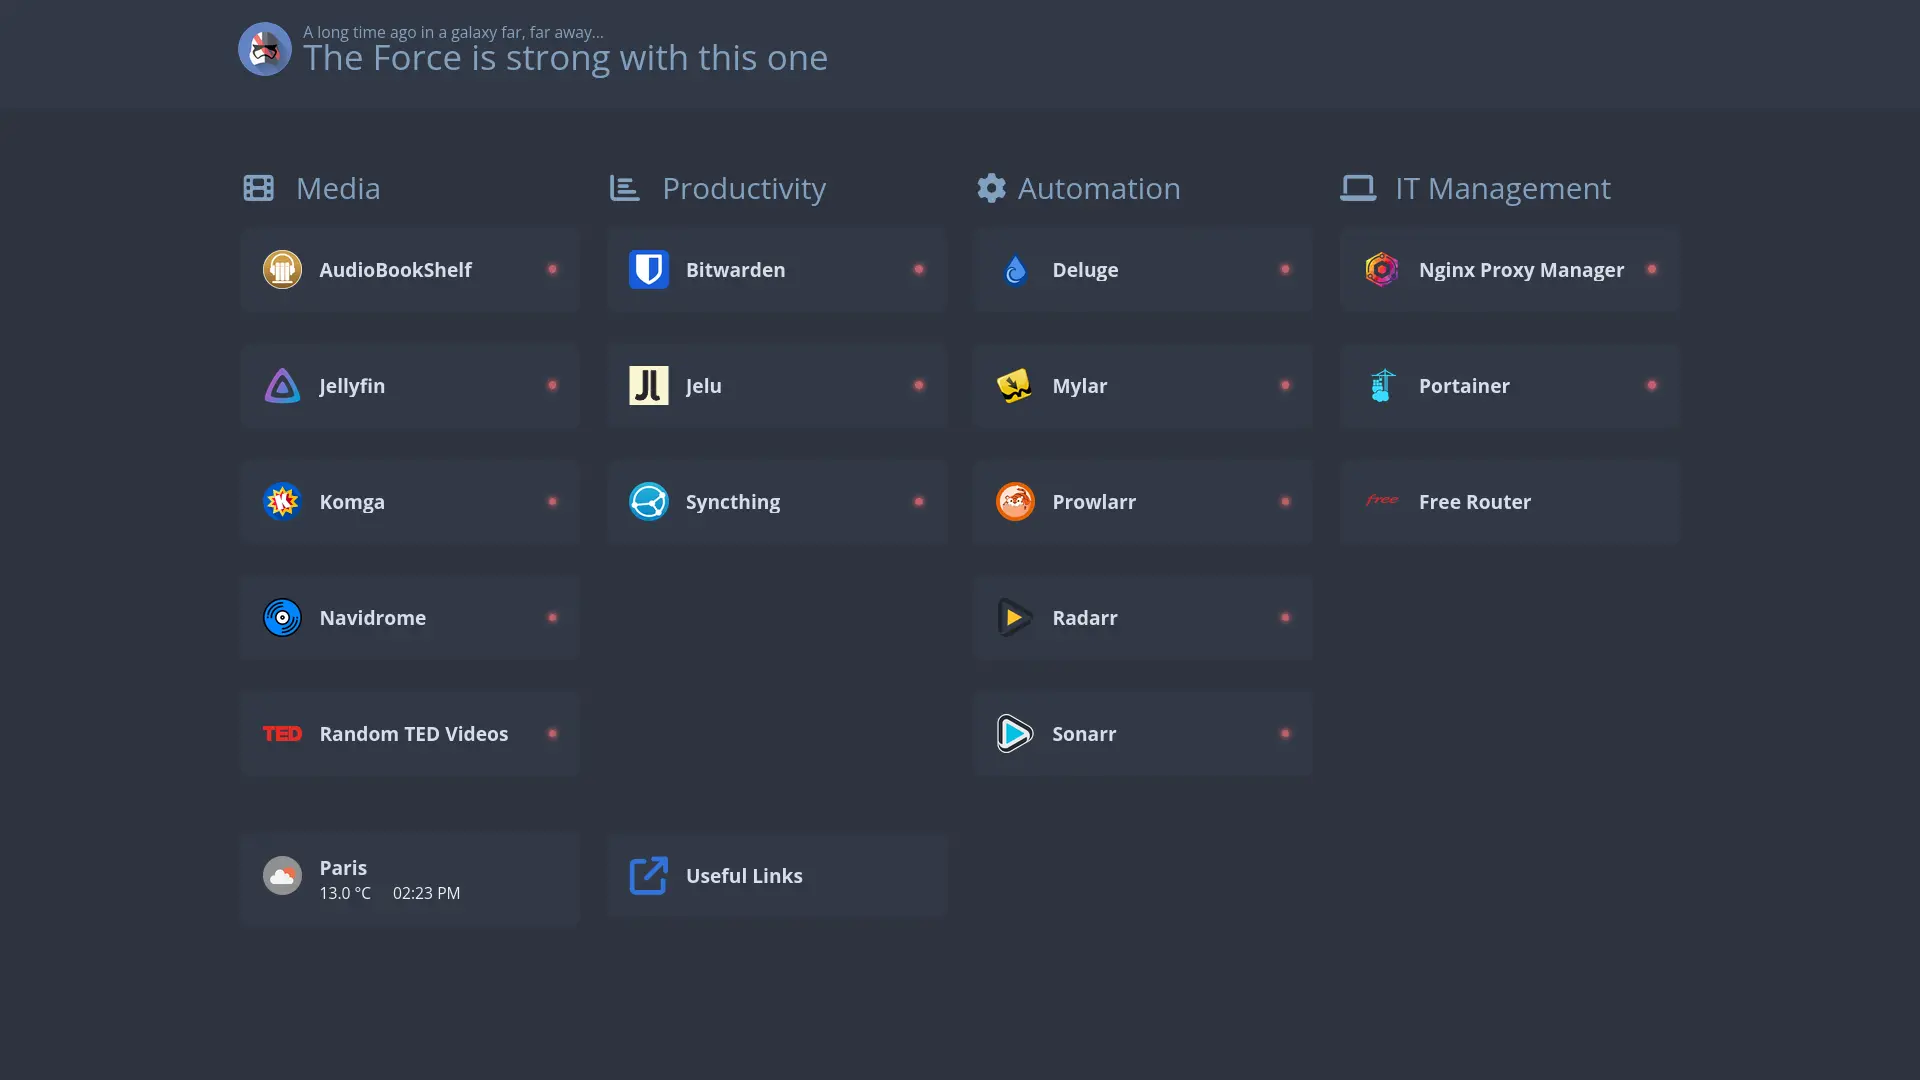
All of the services are inside Docker containers, as I like the ease of management and the containerization of each app.
How do I access all the services?
The server is only hosted locally (localhost); however, I have a VPN setup to connect from outside the Server Network. All the services are behind the Nginx Proxy Manager, a reverse proxy that manages SSL certification for all the apps (giving them an HTTPS connection - certified by Let’s Encrypt).
I will explain in more detail the software itself, the Docker configs, and the overall setup of the server in a future post. To be linked here in the future…